The web Browser you are currently using is unsupported, and some features of this site may not work as intended. Please update to a modern browser such as Chrome, Firefox or Edge to experience all features Michigan.gov has to offer.
7.01.01: Creating report headers with report begin and end dates
Creating a report header with begin and end dates is the first step in creating a report.
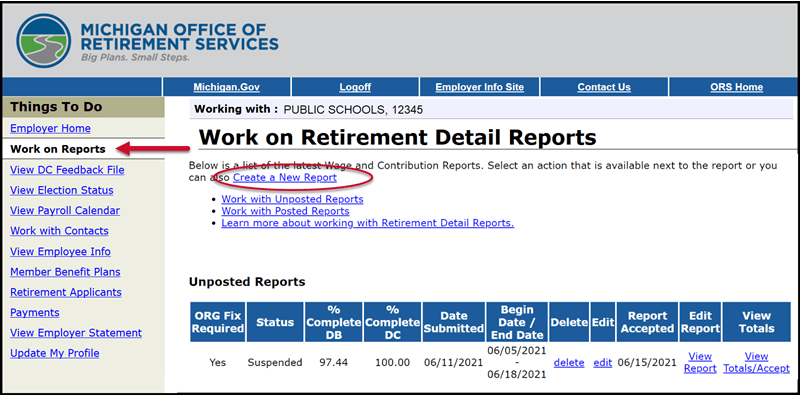
- Log in to the Employer Reporting website and click Work on Reports on the Things To Do menu. This will open the Work On Retirement Detail Reports screen. Click the Create a New Report link.

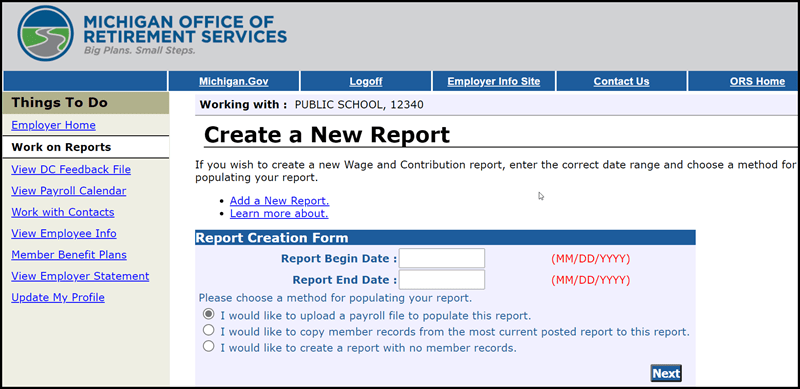
- Use the Create a New Report screen to create the header and begin the process of uploading or creating a new payroll report.

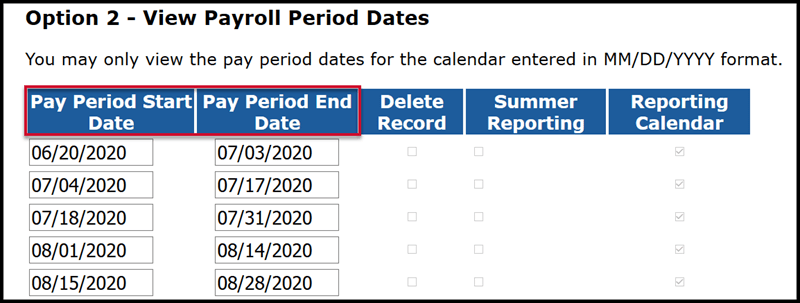
- Enter the report begin and end dates. These are typically the first and last dates of a pay period and must match the dates on your payroll calendar. The begin date of your report must be the day after the end date of a prior report.

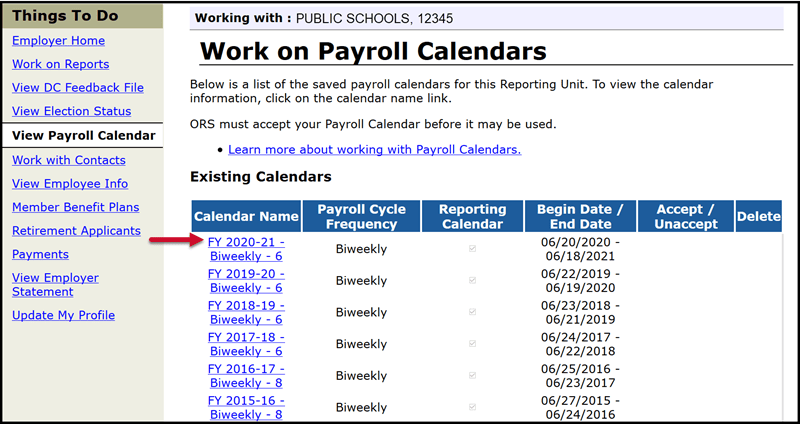
If you need assistance in identifying your report dates, click View Payroll Calendar on the Things To Do menu. Select the fiscal year calendar you wish to view.

If the pay period begin and end dates entered do not match the dates on the payroll calendar you will receive an error message and must make a correction to the dates. Your retirement detail report and the individual records will be matched to the payroll calendar dates on your web site. If the detail record dates fall outside the report dates on your payroll calendar, your report will go through the upload process, but each record will suspend and must be corrected in order to post the wages and service hours.
If you are unsure which method you want to use to populate your report, see section 7.01.03: Populating and submitting reports.
Last updated: 09/11/2015