The web Browser you are currently using is unsupported, and some features of this site may not work as intended. Please update to a modern browser such as Chrome, Firefox or Edge to experience all features Michigan.gov has to offer.
7.01.03: Populating and submitting reports
Populating a report means filling it with your reporting unit's payroll data. You can use one of three methods:
- Upload - In this method, you upload a copy of a file containing your employee record data from your computer or network to the ORS Employer Reporting system.
- Copy forward - In this method, a copy of records from the last successfully posted report is automatically carried forward to the new pay period's report. You may then add, edit, or delete records as needed to reflect the new pay period data.
- Create an empty report and enter records - In this method, you create an empty or shell report. You then manually add employee detail records into the report. See section 7.05.06: Adding, editing, or deleting records in an unposted report.
Let's look at each method in more detail.
Method 1: Uploading your report
Method 2: Copying your report forward
Method 3: Creating an empty report and entering records
Method 1: Uploading your report
This method requires a prepared file laid out in a specific manner. Typically, reporting units use a software vendor to create the file to be uploaded. File layout instructions and examples are found in Chapter 14: Programming. If you have questions or need assistance with the file layout, contact your software vendor.
The uploaded file must use the following naming convention: "ReportingUnitNumber.PayPeriodEndDate.dat" For example, a file for a reporting period that started on 1/1/2021 and ended on 1/14/2021 for reporting unit number 12340 would be named: 12340.01142021.dat
Each file consists of a unique header, detail records, and a unique footer for the employer. The file should include all the data that has been added or changed since the last file was created. Note that you must wait overnight before you may view or edit a report populated with this method.
- On the Report Creation Form, select the first option, Upload a payroll file, and click Next.

- The Upload File screen appears. Click Browse to open the Choose File window.
- Browse your hard drive or network to locate the file.
- Select the file you want to upload and click Open. You will return to the Upload File screen and the name of the file will show in the File Upload field. Click Begin Upload to continue.
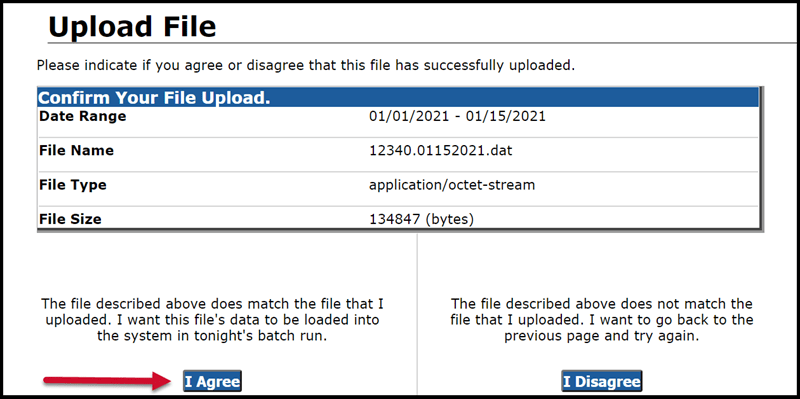
- A confirmation screen will open. Review the file information and if correct, click I Agree.

- The Create Retirement Detail Report Confirmation screen appears.

Note: You must wait until the following day to view or edit the records in the uploaded file. However, you may add new records to the report at this time if necessary. For more information see section 7.05.06: Adding, editing, or deleting records in an unposted report.
Method 2: Copying your report forward
When you use the copy forward method of populating your report, records from your last 100% posted report are automatically carried forward to the new pay period's report. Reports populated using this method are immediately available for review and editing.
The copy forward method is limited. This method is only available if there are no more than two unposted reports and the number of employees does not exceed 150. You must check the report after copying forward as some records will not carry forward, such as retiree records and adjustments. You will need to manually add records for any employees that are missing from your report.
- Select Create a New Report from the Working on Retirement Detail Reports screen.
- Enter your report begin and end dates.
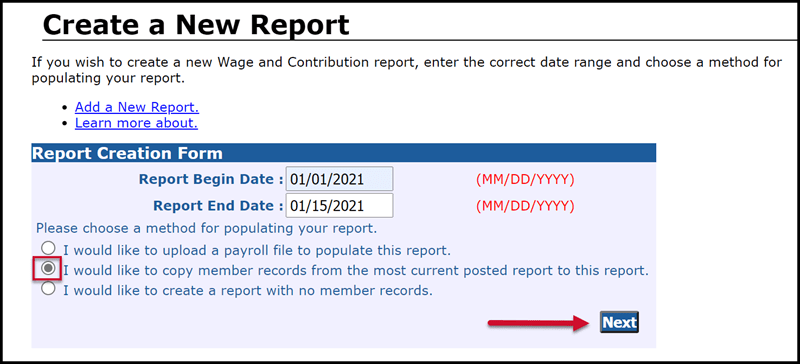
- Select this method by clicking on the radio button next to "I would like to copy member records from the most current posted report to this report." Click Next.

- A confirmation screen will appear. If you have no changes or additions to the records in this report, you're finished. If you do have changes or additions, see section 7.05.06: Adding, editing, or deleting records in an unposted report.

Method 3: Creating an empty report and entering records
This method allows you to manually enter each employee's records.
- Select Create a New Report from the Work on Retirement Detail Reports screen.
- Enter your report begin and end dates.
- Select this method by clicking the radio button next to "I would like to create a report with no member records." Click Next. A confirmation screen will appear.
- To enter the employee records, see section 7.05.06: Adding, editing, or deleting records in an unposted report.
Last updated: 12/27/2018