The MiSTAR application is composed of a few similar structures throughout the application. Most of these items behave similarly from page to page and include:
- List/Grid Pages
- Detail data Pages
1.D.1 Navigation
Upon login you are directed to the MISTAR landing page. In the upper left hand corner is a menu option.

From here, any page within MiSTAR is accessible by clicking the MENU option in the top left. Navigation is broken into categories with individual pages under each category.

The User Information dropdown at the top right of the screen displays your name alongside your organization and includes an option to log out of the application. If a user is associated with multiple operators, they will see a dropdown list of operators immediately after logging in. You must choose one operator to log in as. To switch operators: log out of the application, log back in, and select the desired operator from your dropdown list.
Another new feature within MiSTAR is the notifications bell. This icon expands to display notifications of when a form has been successfully processed.

When navigating back and forth between pages you can either use the back button in the browser or the breadcrumb in the upper left-hand corner of the page. The browser back button will typically leave any filters intact while the breadcrumb refreshes the page. You can also maintain filters/searches by opening links using right-click followed by “open link in new tab” or using the Save My View button.
1.D.2 List/Grid Pages
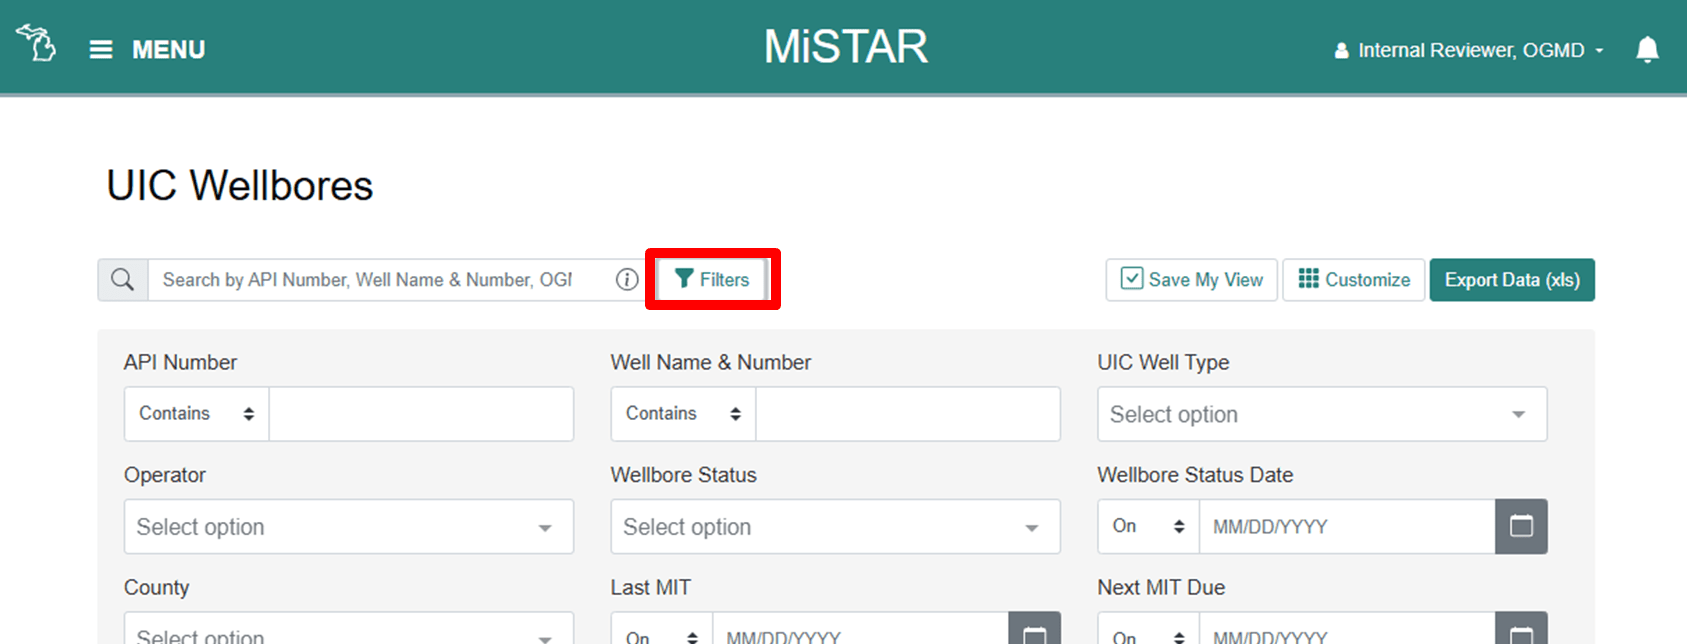
The MiSTAR List/Grid Pages all have the same basic functionality and features and appear as a table with links to more detailed records. Users can search, filter, export, or navigate to pages with more detailed information. At the top of list pages is a search bar with a selection of fields available for searching in light gray text.

For additional search filters click the Filters box to the right of the search box and the options will open. There are different filter options available for different types of data. Note- if for any reason a data field is blank in the database, filtering by that field will not display those records in the filtered list.
A recent addition to MiSTAR is the Save My View button. This button saves the page filters, column settings and sorting in the browser cache- allowing users to navigate away and back to the same grid without losing their settings.

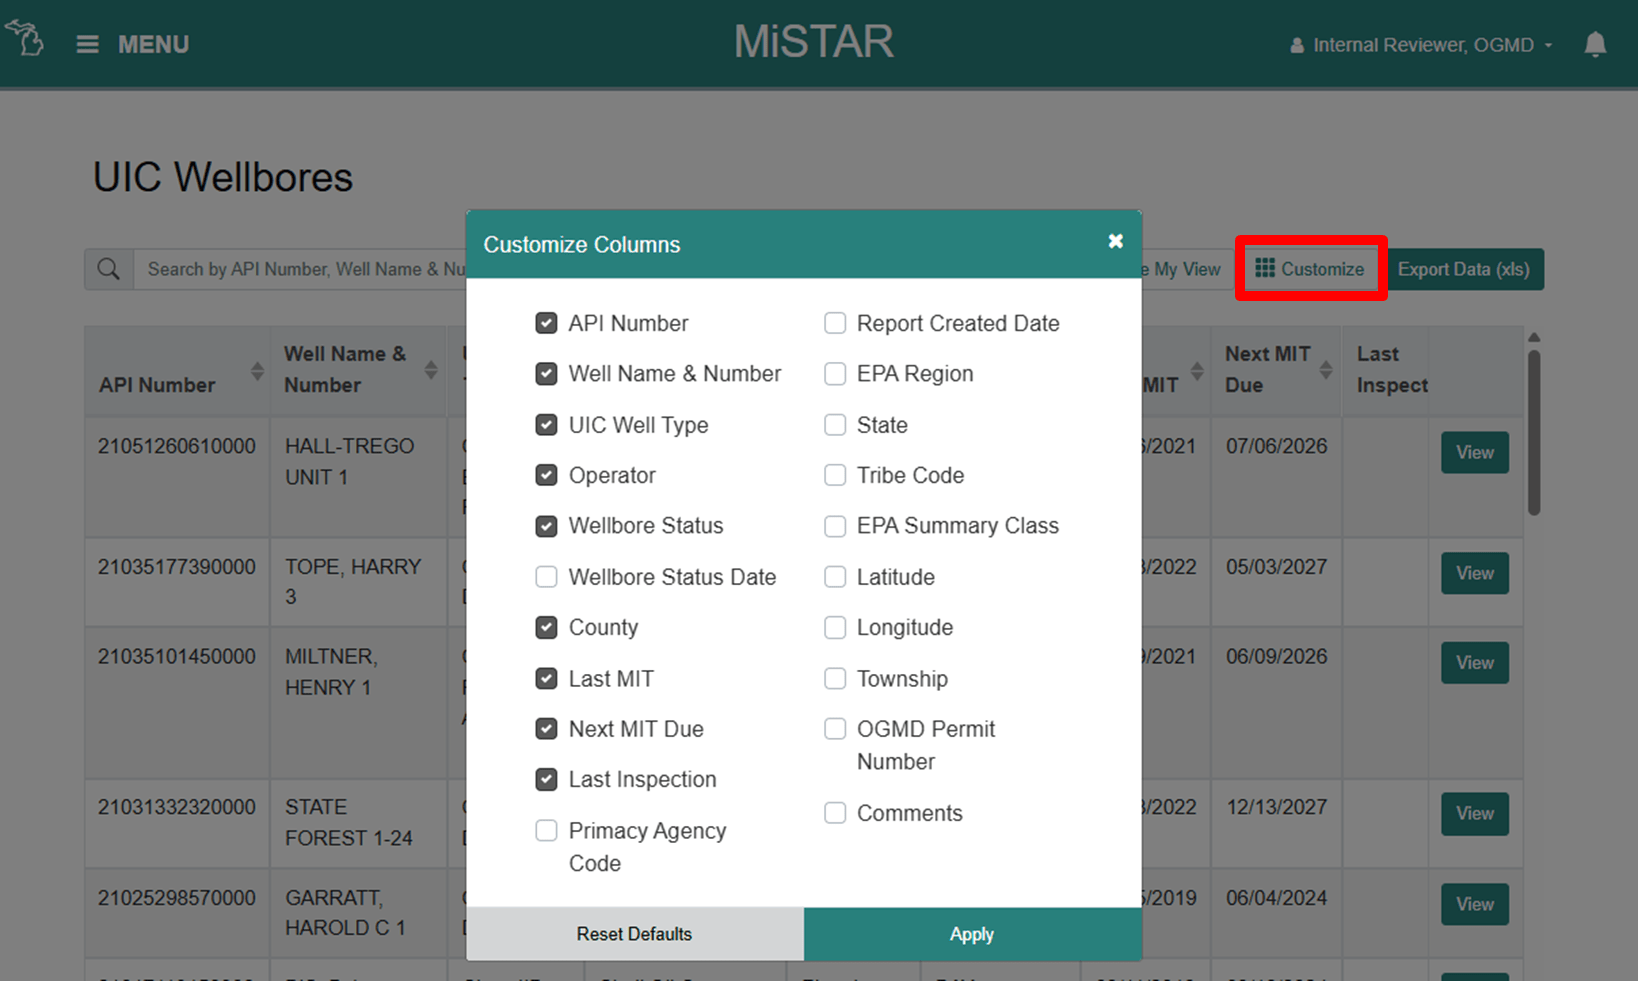
The results of the search are displayed on the same page. The columns displayed are customizable using the Customize button on the upper righthand side of the page. The default columns have a check next to them. Additional columns can be selected, or the default selections can be unselected. Users can also reset the list to default options.
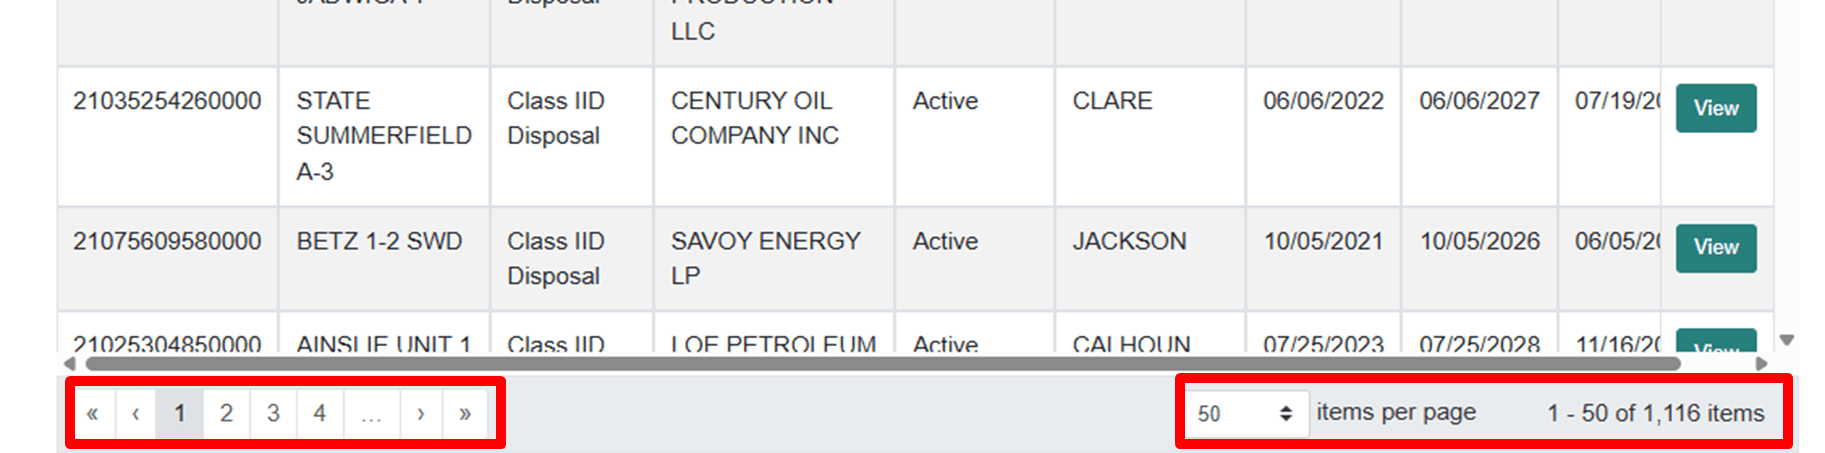
The resulting well list can be sorted on any column by clicking the column header. Click multiple times to change the sorting direction. Columns can also be re-ordered by dragging and dropping a column into a desired position. The bottom of a table shows the number of wells that meet the search criteria as well as controls to page through the results.
The data within the grid can be exported at any point using the Export Data (.xls) button on the upper righthand portion of the page. This will export the data for all the columns available for the table. It will not limit the data to just the columns selected to view.

When the export is complete, the user will be notified that the download is complete, and the file can be opened in Excel. If the export button is grayed out it means the data set in the grid is too large. Exporting data is limited to 25000 records.
Some list pages may contain additional buttons depending on the type of user and their assigned roles. For instance, the Submission List page also contains the Upload Form button.
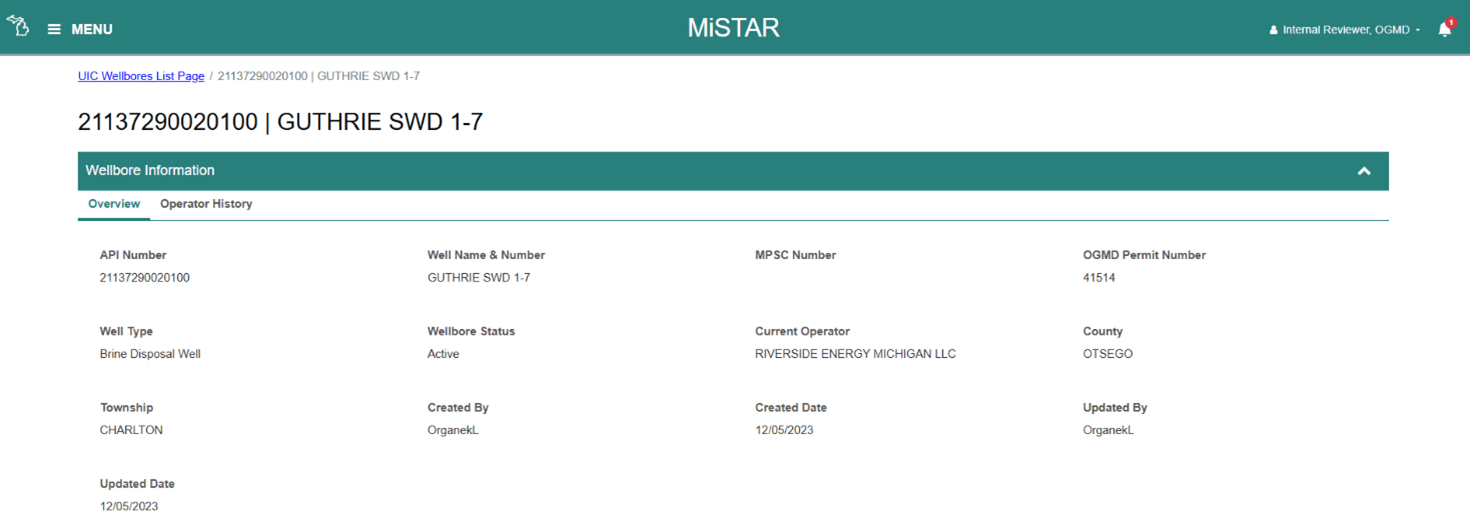
1.D.3 View Detail Records
Most List/Grid pages have additional data that can be viewed by selecting the View button on the right side of the table. This includes the Submissions List page. Detail pages can have sections with individual fields of data, sections with uploaded documents, or sections that are grids and function similarly to list/grid pages. Below is an example of a wellbore list page and the associated detail page for a single record.

The lower portion of the page shows Detail Recordsfor an individual wellbore for a variety ofdata types. Each of these “tabs” contains a different table of data.
Note: Historical data may fill different fields than data submitted via MiSTAR.
Injection Data example Detail Records:

Detail record tables may have search bars, filters, customization of columns, and the ability to export data as appropriate.